
Cube Nets and Paper Folding
Cube Nets and Paper Folding
Text
A cube net is a two-dimensional arrangement of six squares that can be folded to form a 3D cube.
Each square represents a face of the cube, and the layout shows how the faces are connected.


Cube Nets and Paper Folding
Text
A cube net is a two-dimensional arrangement of six squares that can be folded to form a 3D cube.
Each square represents a face of the cube, and the layout shows how the faces are connected.
Cube Nets and Paper Folding
Text
When you fold the net into a 3D shape, it will form a cube.

A cube net is a two-dimensional arrangement of six squares that can be folded to form a 3D cube.
Each square represents a face of the cube, and the layout shows how the faces are connected.
Cube Nets and Paper Folding
Text
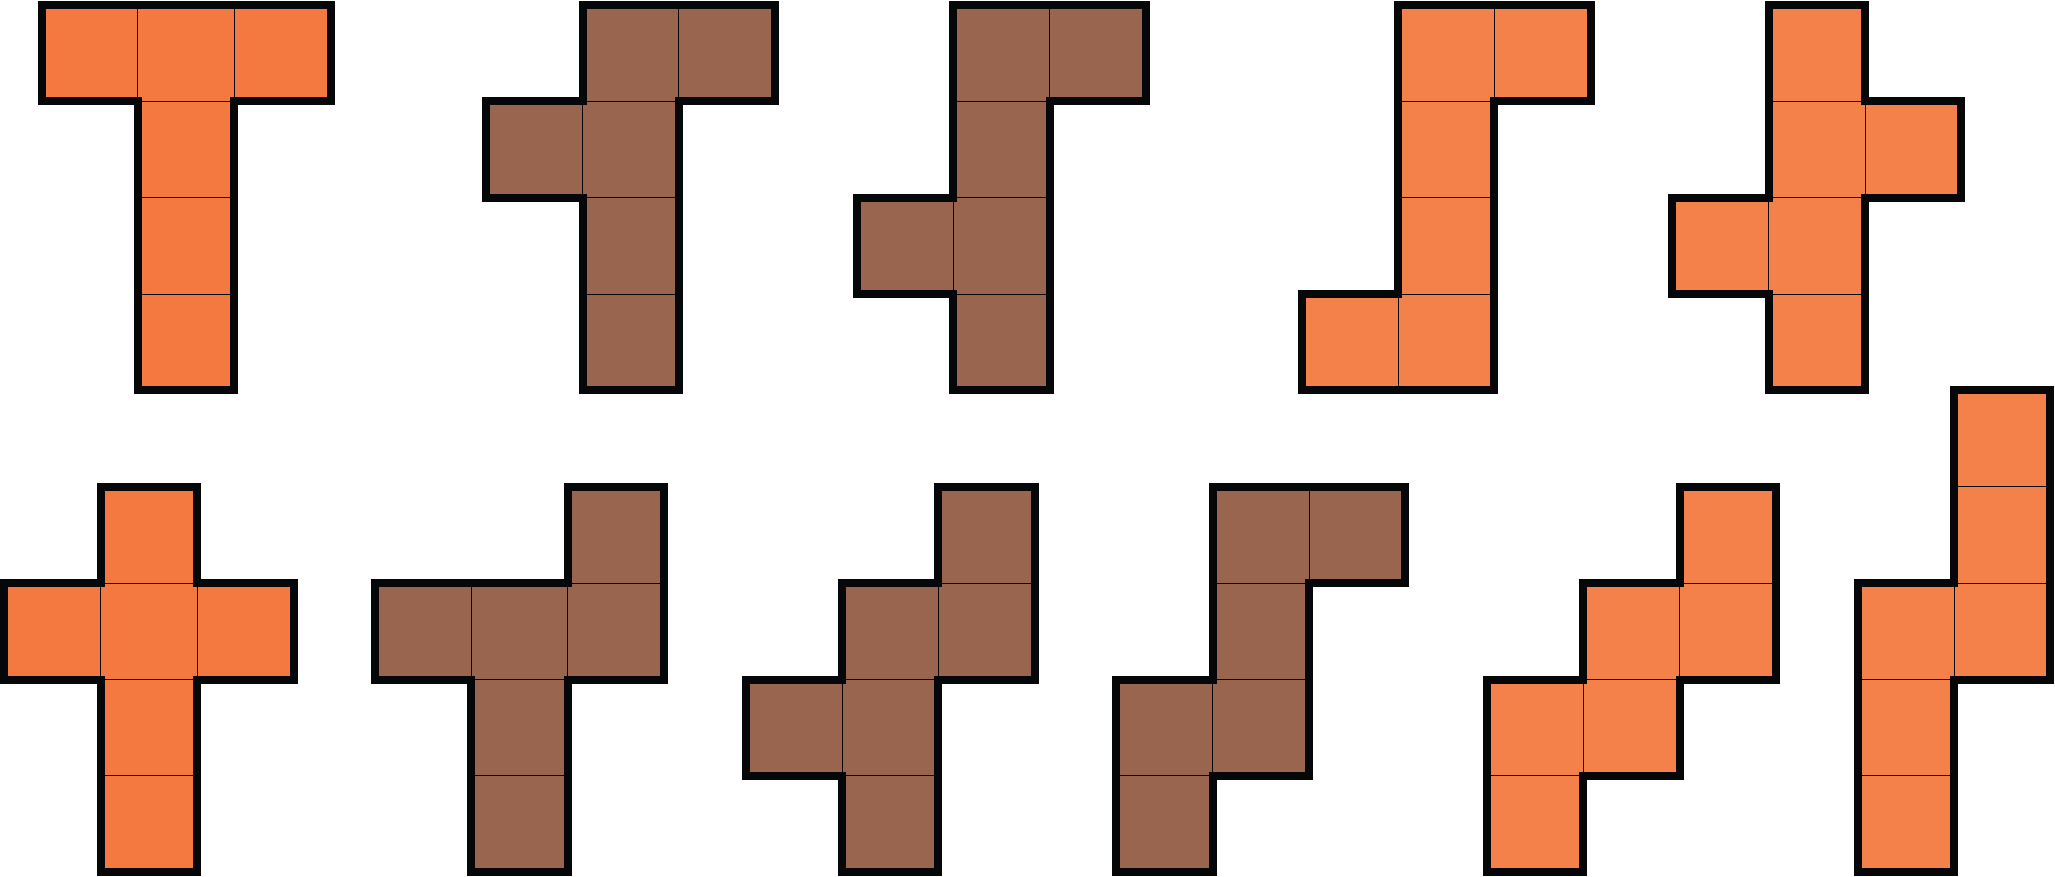
There are 11 different nets that can be formed into a cube.
Cube Nets and Paper Folding
Text
There are 11 different nets that can be formed into a cube.
Cube Nets and Paper Folding
Text
There are 11 different nets that can be formed into a cube.
Each net will fold in different ways, meaning that each face will also connect to each other in different ways.
Cube Nets and Paper Folding
Text
There are 11 different nets that can be formed into a cube.
Each net will fold in different ways, meaning that each face will also connect to each other in different ways.
Take a moment to try to visualise the way they will connect.
These corners will connect when folded
Cube Nets and Paper Folding
Text
There are 11 different nets that can be formed into a cube.
Each net will fold in different ways, meaning that each face will also connect to each other in different ways.
Take a moment to try to visualise the way they will connect.
Cube Nets and Paper Folding
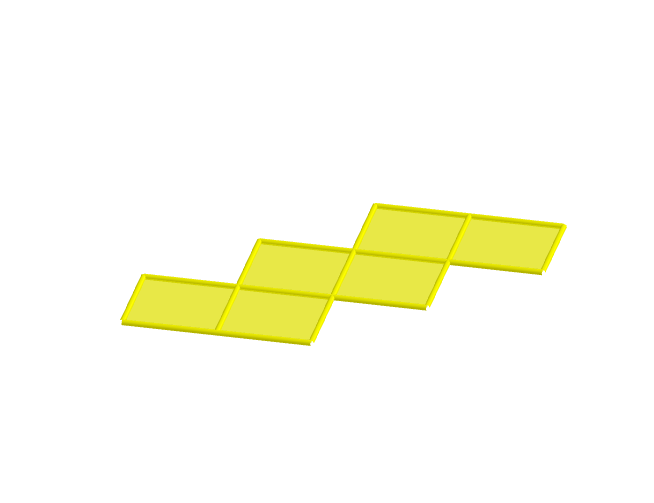
You can download a printable set of all cube nets here:
Printing and folding the nets will help you visualise how each net folds into a cube.
Cube Nets and Paper Folding

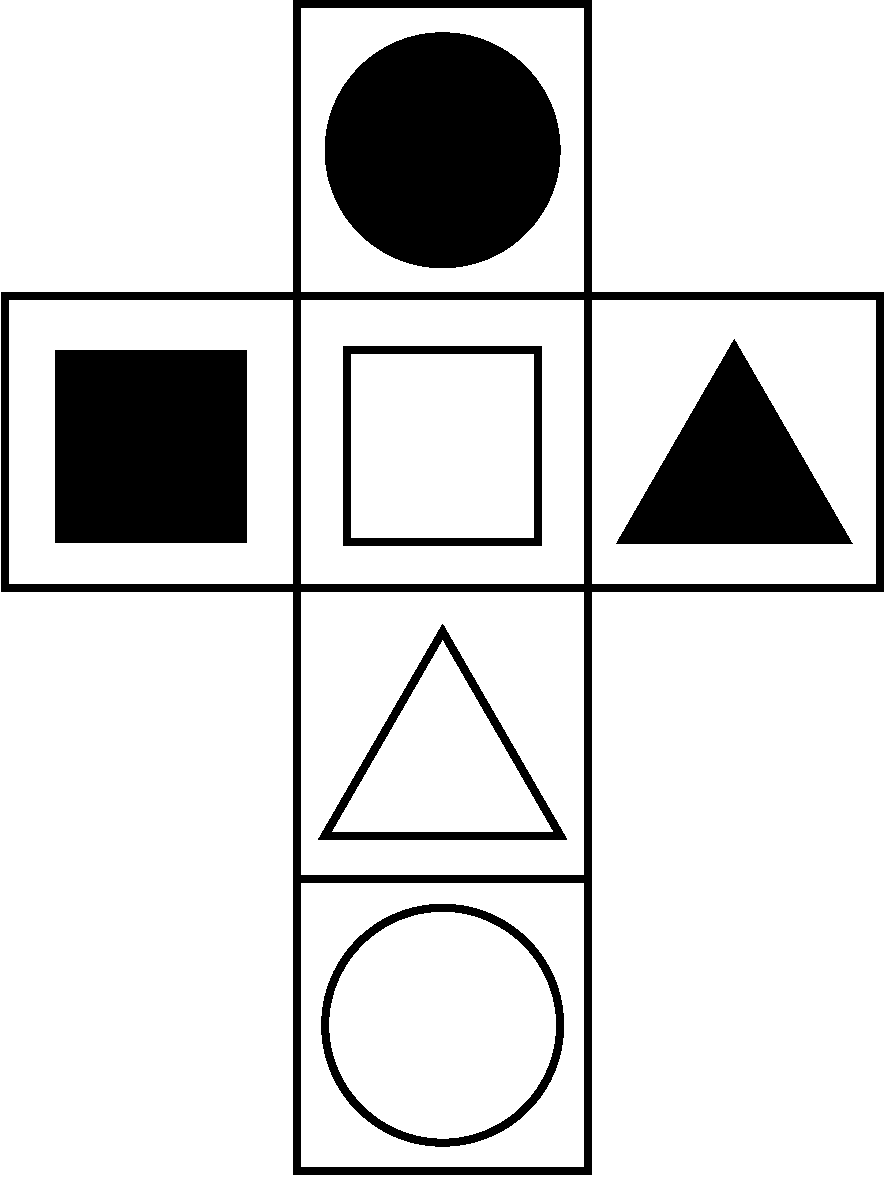
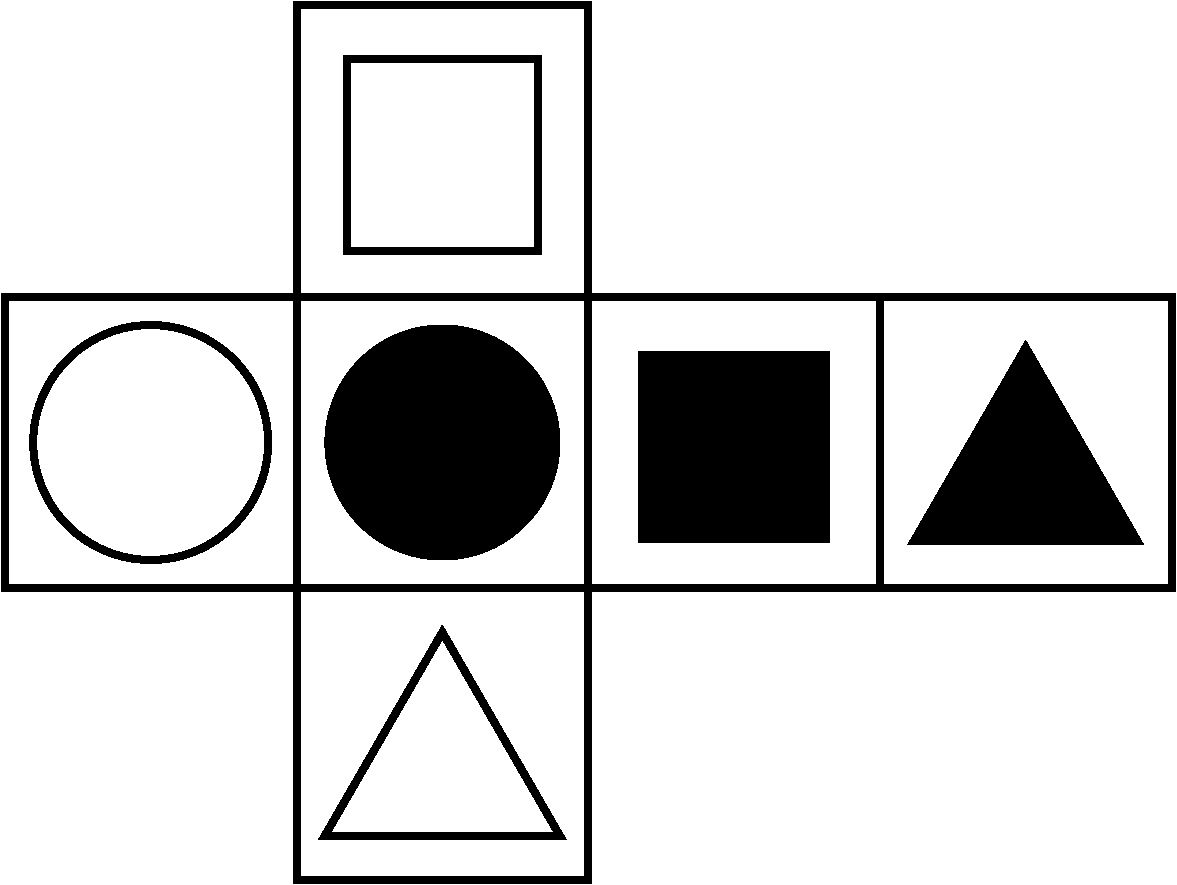
Study the cube above, then select the matching net from below.

Cube Nets and Paper Folding
In order to answer this question, we need to break it down into logical steps.
We start by identifying the parts of the net visible on the 3D model. We can only see three sides, so those are the sides we need to focus on.
Cube Nets and Paper Folding
In order to answer this question, we need to break it down into logical steps.
We start by identifying the parts of the net visible on the 3D model. We can only see three sides, so those are the sides we need to focus on.
In the original, we can see the black triangle connected to the black circle. In d, however, it will be on the opposite side of the cube. We can rule out option d.
Cube Nets and Paper Folding
In order to answer this question, we need to break it down into logical steps.
We start by identifying the parts of the net visible on the 3D model. We can only see three sides, so those are the sides we need to focus on.
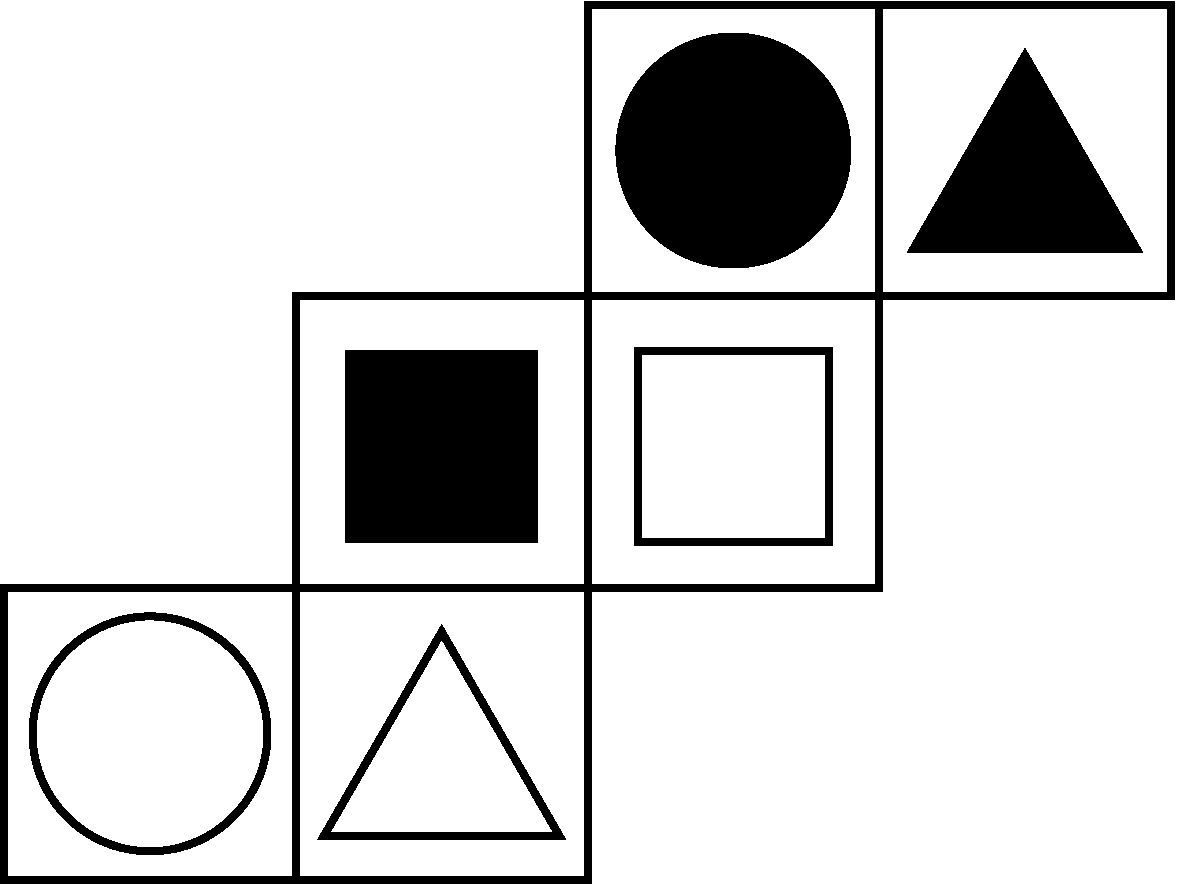
In the original, the black triangle is pointing towards the black circle. This will not be the case for net c. We can rule this option out.
Cube Nets and Paper Folding
In order to answer this question, we need to break it down into logical steps.
We start by identifying the parts of the net visible on the 3D model. We can only see three sides, so those are the sides we need to focus on.
The same applies to net b. When folded, the black triangle will not point towards the black circle. We can rule out option b.
Cube Nets and Paper Folding
In order to answer this question, we need to break it down into logical steps.
We start by identifying the parts of the net visible on the 3D model. We can only see three sides, so those are the sides we need to focus on.
All the features in option a matches the final cube. The direction of the triangle is correct and the black triangle, black circle and white square are next to each other.
Cube Nets and Paper Folding
In order to answer this question, we need to break it down into logical steps.
We start by identifying the parts of the net visible on the 3D model. We can only see three sides, so those are the sides we need to focus on.
Cube Nets and Paper Folding
Key steps in solving cube nets
Cube Nets and Paper Folding
1. Identify the relevant sides.
Key steps in solving cube nets
Cube Nets and Paper Folding
1. Identify the relevant sides.
2. Confirm that the correct sides are next to each other.
Key steps in solving cube nets
Cube Nets and Paper Folding
1. Identify the relevant sides.
2. Confirm that the correct sides are next to each other.
3. Verify direction of objects after folding the net.
Key steps in solving cube nets
Cube Nets and Paper Folding
1. Identify the relevant sides.
2. Confirm that the correct sides are next to each other.
3. Verify direction of objects after folding the net.
4. Notice opposite sides: Opposite faces in a cube never touch. Use this to eliminate invalid nets or confirm correct ones.
5. Visualize the Folding Process: Mentally fold the net step by step. Pay attention to how the squares align to form the cube.
Key steps in solving cube nets
Cube Nets and Paper Folding
Folded paper
Cube Nets and Paper Folding
Folded paper
Paper folding is a type of non-verbal reasoning question that tests your ability to visualize how a piece of paper looks when folded.
You may be asked to predict the result of folds, cuts, or holes punched into the paper.
Cube Nets and Paper Folding
Folded paper
Paper folding is a type of non-verbal reasoning question that tests your ability to visualize how a piece of paper looks when folded.
You may be asked to predict the result of folds, cuts, or holes punched into the paper.

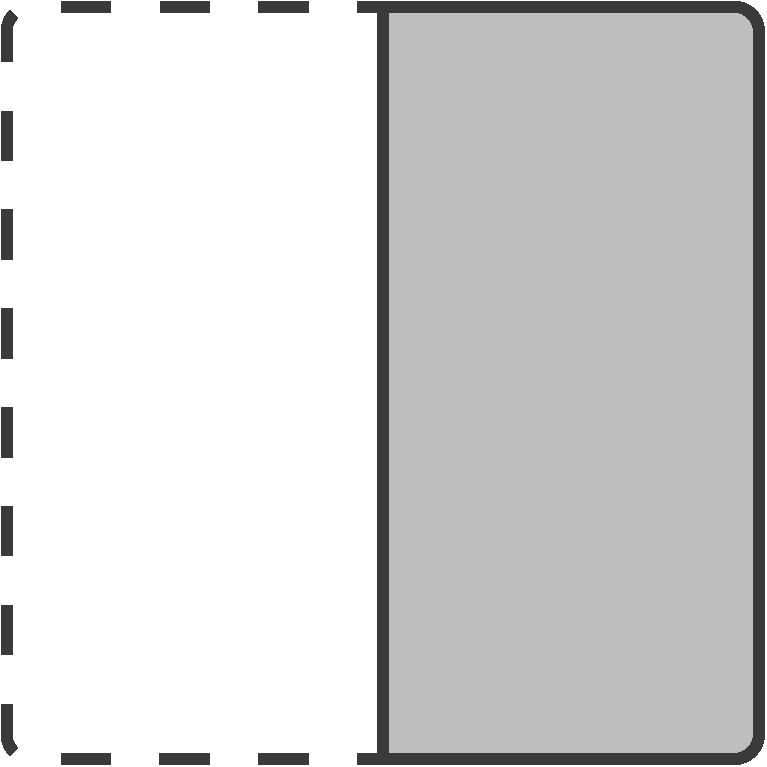
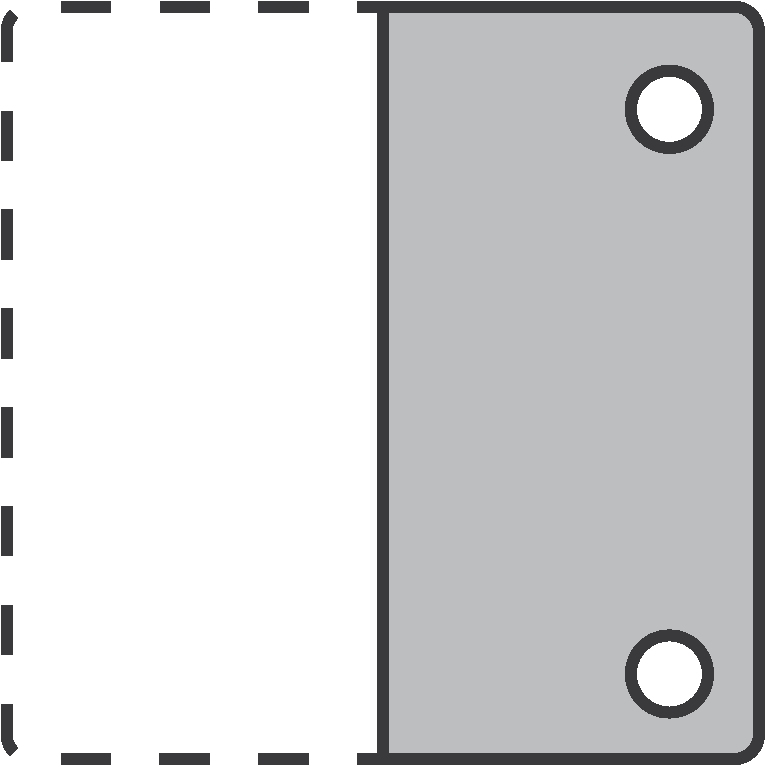
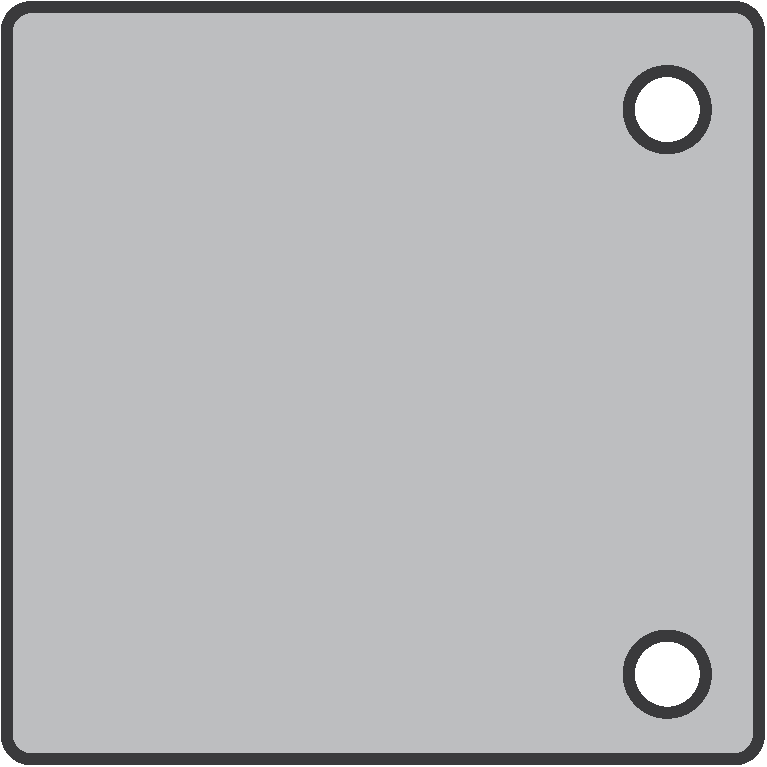
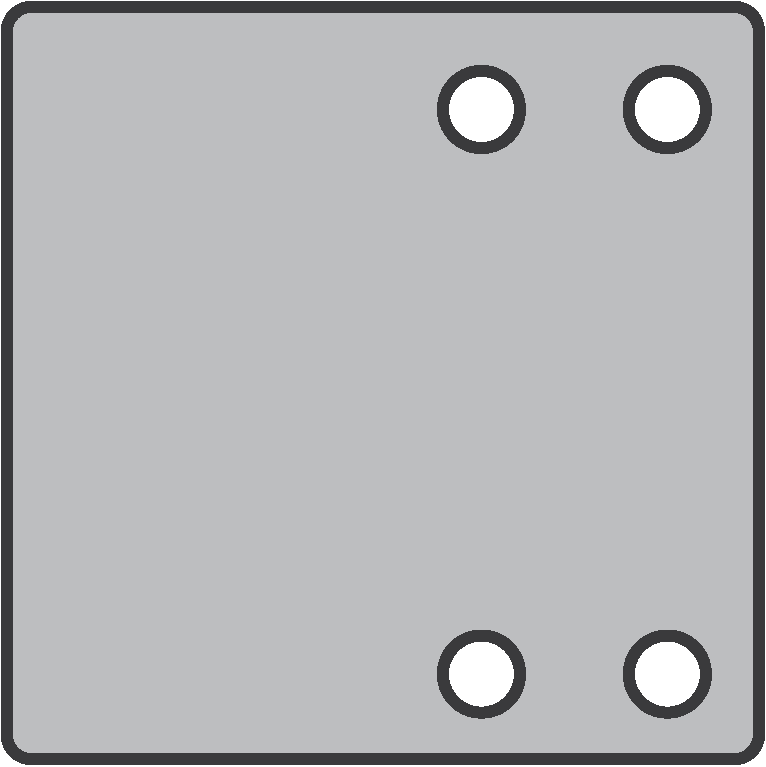
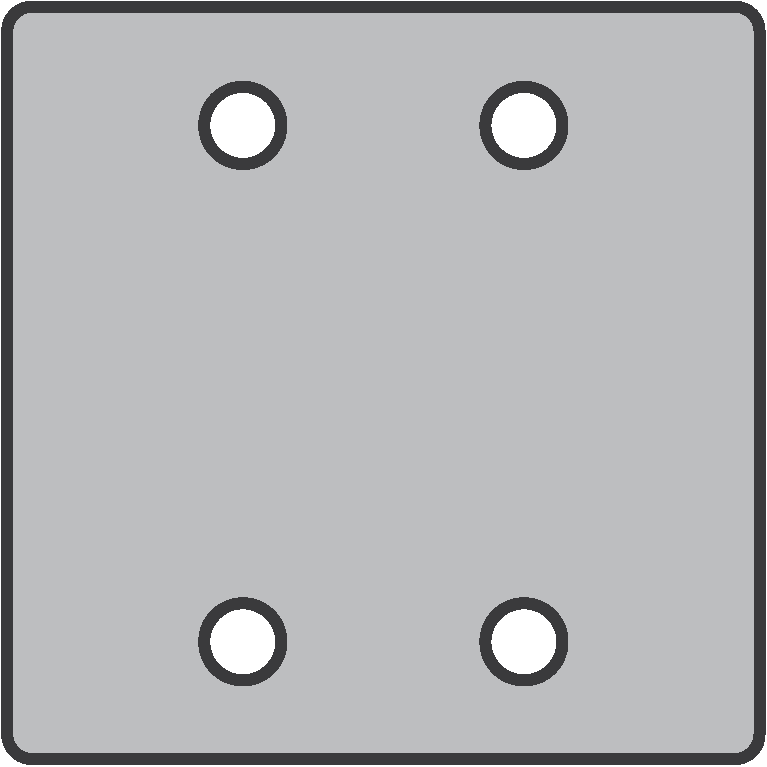
We start with a square piece of paper
We fold it in half along a vertical line.
We punch two holes all the way through the folded paper.
Cube Nets and Paper Folding
We start with a square piece of paper
We fold it in half along a vertical line.
We punch two holes all the way through the folded paper.
How will the paper look if we unfold it again?

Cube Nets and Paper Folding
We start with a square piece of paper
We fold it in half along a vertical line.
We punch two holes all the way through the folded paper.
In order to successfully solve these types of questions, we need to start by understanding the paper fold. In this case the paper was folded just once along a vertical axis.
Cube Nets and Paper Folding
We start with a square piece of paper
We fold it in half along a vertical line.
We punch two holes all the way through the folded paper.
Since we're punching holes through all layers, the effect of unfolding the paper will be two halves, reflected along a vertical line in the middle.
We can therefore rule out option b. The only line of reflection is horizontal not vertical.
Cube Nets and Paper Folding
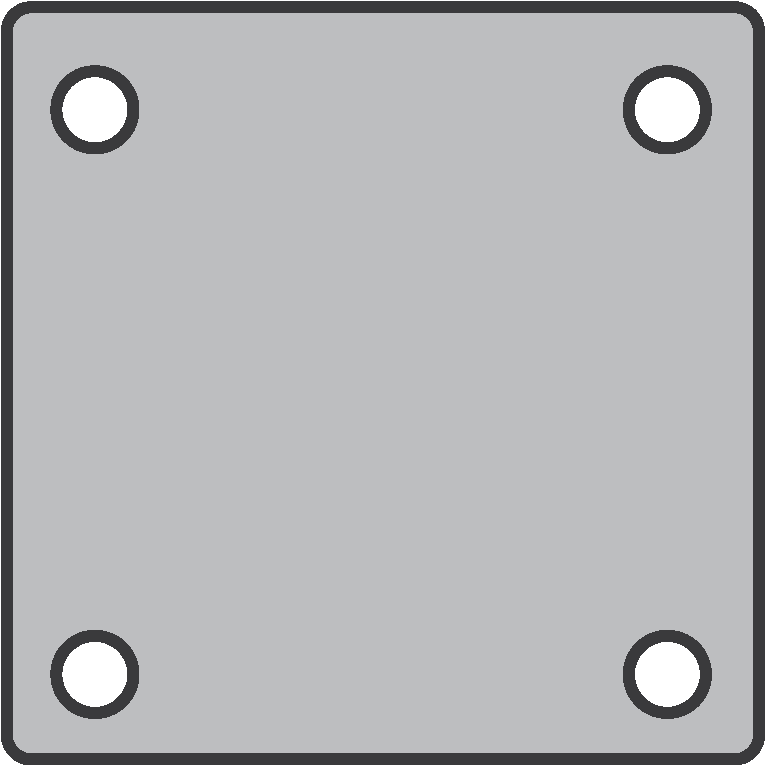
We start with a square piece of paper
We fold it in half along a vertical line.
We punch two holes all the way through the folded paper.
We know the line of reflection will be in the middle since the paper was folded in two equal halves. We can therefore rule out option c.
Cube Nets and Paper Folding
We start with a square piece of paper
We fold it in half along a vertical line.
We punch two holes all the way through the folded paper.
Option a is indeed reflected along a vertical line. But if we study the location of the holes, we'll see that they are not in the same position as the original. They are further away from the edge of the paper.
We can rule out option a.
Cube Nets and Paper Folding
We start with a square piece of paper
We fold it in half along a vertical line.
We punch two holes all the way through the folded paper.
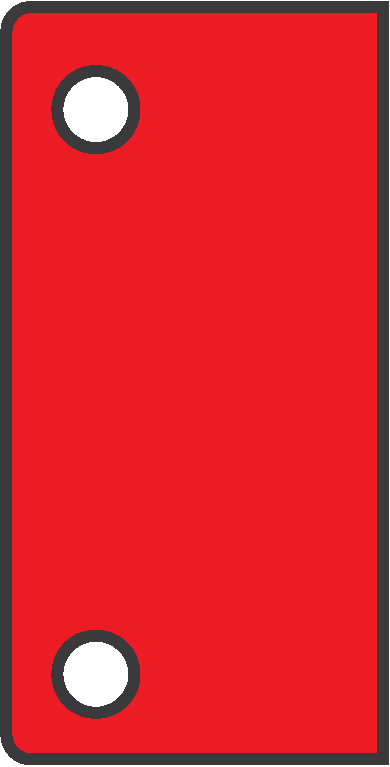
Option d is a perfect representation of how the final paper would look if we unfolded it. The holes are placed correctly and the reflection is along the same central vertical line.
The correct answer is d.
Cube Nets and Paper Folding
We start with a square piece of paper
We fold it in half along a vertical line.
We punch two holes all the way through the folded paper.
Option d is a perfect representation of how the final paper would look if we unfolded it. The holes are places correctly and the reflection is along the same central vertical line.
The correct answer is d.
Cube Nets and Paper Folding
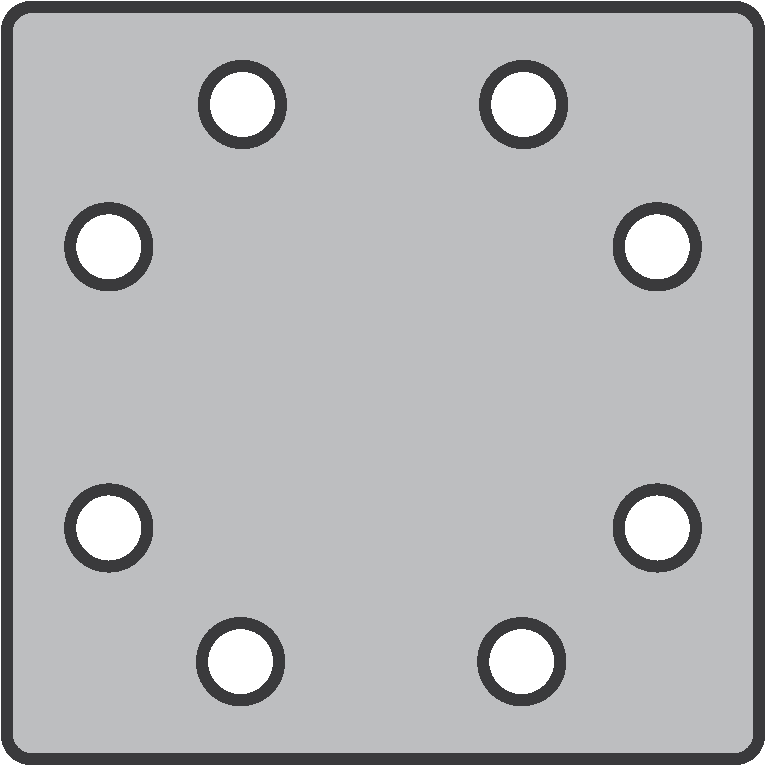
Let's try one more - this time a bit more complex.
Cube Nets and Paper Folding
Let's try one more - this time a bit more complex.


How will the paper look if we unfold it again?

Cube Nets and Paper Folding
How will the paper look if we unfold it again?
We can use our understanding of reflection to imagine how this paper will look if we unfold it.
Cube Nets and Paper Folding
How will the paper look if we unfold it again?
The paper has first been folded in half diagonally. This creates a diagonal line of reflection. Then the paper was folded in half again. This will create four identical sections.
Cube Nets and Paper Folding
How will the paper look if we unfold it again?
By understanding the lines of reflection, we can visualise how this will create four triangles around the central point, each with two holes.
We can now match this against the options. The correct answer is c.


Cube Nets and Paper Folding
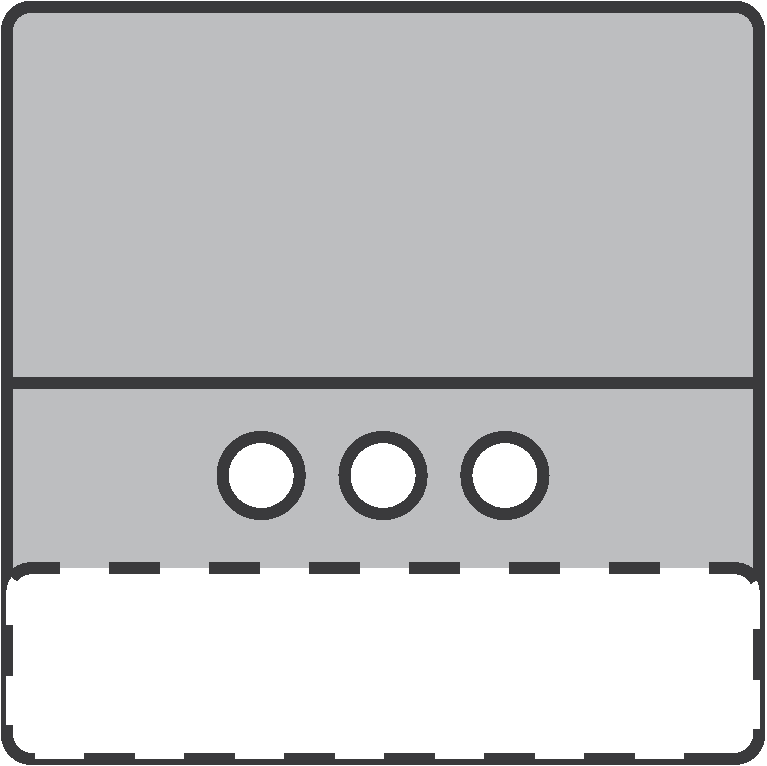
So far we've looked at folds that cover the entire sheet of paper.
Some questions, however, may involve folds that only affects some parts.
Cube Nets and Paper Folding
So far we've looked at folds that cover the entire sheet of paper.
Some questions, however, may involve folds that only affects some parts.

Cube Nets and Paper Folding
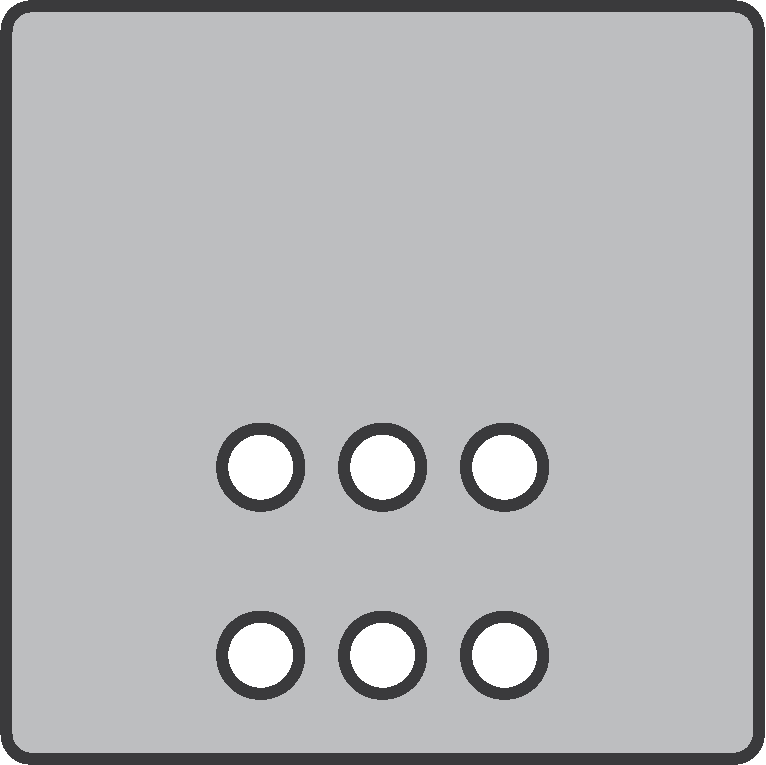
We solve these types of questions by applying the same logic.
1. What is the line of reflection?
Cube Nets and Paper Folding
We solve these types of questions by applying the same logic.
1. What is the line of reflection?
2. Which bit will be reflected?

Cube Nets and Paper Folding
We solve these types of questions by applying the same logic.
1. What is the line of reflection?
2. Which bit will be reflected?
3. How will the reflection look?
Cube Nets and Paper Folding
Visualize Each Fold Sequentially: Imagine the paper folding step by step. Focus on how each fold changes the visible areas and affects symmetry.
Use Symmetry to Your Advantage: Most folds create symmetrical patterns. If the question involves cuts or holes, they will usually appear symmetrically when the paper is unfolded.
Pay Attention to Folded Layers: Identify which layers of the paper will receive cuts or holes. Inner folds might result in fewer or smaller shapes than outer folds.
Track the Orientation of Patterns or Cuts: When folds involve patterns, consider how they flip or rotate during the process. This will help in predicting the final layout.
Eliminate Impossible Options: Use logic to rule out answers that don’t match the number of folds, alignment, or expected symmetry of the final design.
Cube Nets and Paper Folding

Well done! You should now have a very good understanding of cube nets and paper folding. NVR requires a lot of practice, however, so the next step is to get going with some of our NVR mock tests.
The key to NVR tests is familiarity with the question types. Keep practicing and you will notice that you get a little bit better and a little bit faster each time.